Last week I showed you how I made over the powder room in my house. One of the updates to the room was to repurpose a sideboard into a sink vanity.

Today I am sharing how I did it.
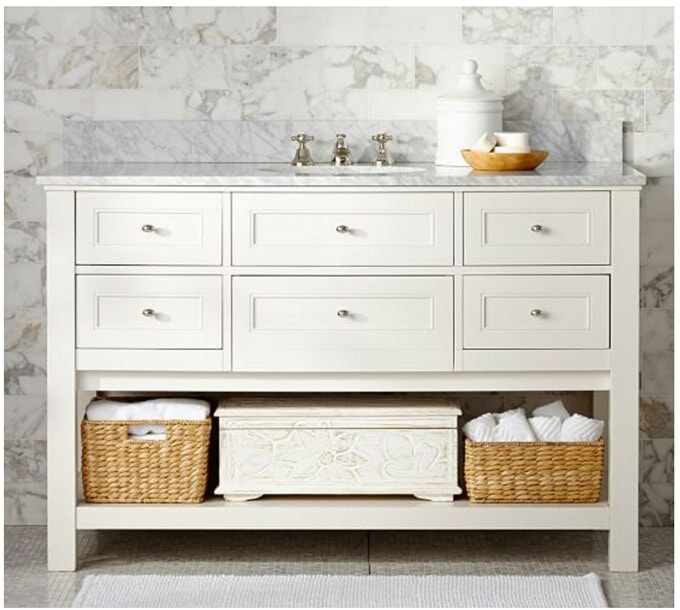
When I was gathering ideas for the room, I really liked this sink vanity from Pottery Barn, but not the $2,299 price tag.
I was thinking I could make something from scratch, but then got the idea to use the sideboard that was in my kitchen in my previous house as the sink vanity. The top cabinet is a separate piece of furniture that sat on top of the sideboard.
When we moved to Lake Murray, the sideboard (bottom section) didn’t fit anywhere in the new house and was sitting in my bedroom until we could figure out what to do with it.
As you can see, it fits perfectly in the powder room.
How to Repurpose a Sideboard into a Sink Vanity
I used a sideboard that had 2 small drawers, two cabinet doors and one large drawer on the bottom. You can create a sink vanity with a dresser or desk as long as the piece will have clearance for the sink and plumbing. I had to remove the drawers so the sink and plumbing would fit. I had painted the piece with chalk paint and a faux Carrara marble technique on the top a few years ago. It is protected by layers of buffed paste wax.
supplies needed:
- Sideboard or dresser
- Sink with sink template – Home Depot
- Faucet and plumbing connections
- Jigsaw
- Circular saw
- Drill and drill bit
- Tape measure
- Pencil
- 1/4″ plywood
- Band-It Iron-On Wood Veneer + Trimmer
- Iron
- Liquid Nails adhesive
- Baskets – IKEA
- Paint and paint brush
- The drop-in sink comes with a paper cutting template. To use it, turn the template to the wrong side. Use a pencil to trace over the oval shape. You will be able to see it through the paper. Turn the template back to the right side. Place it on top of the vanity and center it. Draw over the oval with a pencil.
2. The pressure of the pencil will transfer the graphite from the penciled oval on the wrong side to the vanity top.
3. Use a drill and drill bit to make a hole large enough to place the jigsaw blade into the top. Cut out the oval with a jigsaw.
4. It will look like this. As you can see, the 3 drawers have been removed.
5. I also had to remove this center rail that separated the two top drawers.
6. I then used the jigsaw to cut out enough space on the back and bottom of the sideboard for the plumbing pipes that connect to the wall.
7. Ed helped me put the sideboard into place making sure to align the plumbing with the cutout.
8. Drop in the sink and faucet.
9. Attach the plumbing. Ed did the plumbing and needed to buy new plumbing fittings. 2 connectors for the hot and cold connections and an adjustable pipe since the previous sink drain was much lower and further back.
10 Once all the plumbing was attached and working I needed to add the drawers back in. The drawers would not fit since the sink comes down into the drawer space.
11. Cut the fronts off each drawer.
I left about 2 inches on each side of the cut drawer fronts so I could glue them into place with Liquid Nails. They are fake drawers now. 🙂
12. Instead of faking out the large bottom drawer, I added a piece of plywood to fit into the space to make a shelf to hold baskets.
How to Create a Finished Edge on Plywood
If you have ever worked with plywood, you know that the edges are unfinished. To fix this I used iron-on wood veneer edging. It is very easy to use and comes in a few different widths, all are trimable. You can find it in the lumber aisle at the home improvement store.
- First sand the edge of the plywood with 100 grit sandpaper and then clean off the sanding grit.
2. Cut a piece of the veneer to the length needed and then use an iron to press it on. It adheres pretty quickly.
3. Trim any excess on the end with sharp scissors or a craft knife.4. Use the Band-It Edge Trimmer or a craft knife to trim the veneer to the fit the width of the plywood’s edge.
Once it is trimmed, you can paint it and your plywood will look like a better grade of lumber.
I used Liquid Nails to attach the plywood shelf.
I painted the shelf with two coats of white paint in a satin finish and let it dry.
I then placed three IKEA baskets onto the shelf. I had to cut the center basket in half because the plumbing runs up in the center of the vanity.
To do this, I used a hand saw to cut the basket in half and then pushed the two sections of the cut basket together so they overlapped to create a much smaller basket that still looks the same from the front.
Creating the vanity from the sidebar was much easier to do than I expected. Making the first cut into the top was the hardest only because once you cut the hole for the sink, your committed and there is no going back to using the piece as it was originally intended. I am thrilled how it came out and best of all we saved ourselves $1000 or more by DIY’ing and repurposing.
To see more about how I transformed this powder room, click here: Quiet Chic: Powder Room Makeover
To learn how to paint a faux Carrara Marble top, click here: Faux Carrara Marble Painting Technique
- Pin
Post navigation
Previous Previous How to Make an Outdoor No Sew Round Tablecloth
Next Continue Hardwood Flooring Repair: Fixing a Big Gap

